Grosgrain ribbon
Scissors
Pinking shears
Sewing machine
Needle and thread
Rhinestone trim and dangle
Two 3/8-inch snaps
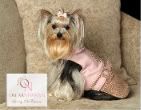
Dog Necklaces How-To1. Begin by measuring your dog's collar size using measuring tape. Cut a strip of 3/4-inch-wide grosgrain ribbon to your dog's collar length, plus an additional 3 inches. Fray check each end of the cut ribbon. Trim the ribbon ends with pinking shears.
2. Fold under 1 inch of the ribbon at each end. Using a sewing machine, stitch the folded ribbon hem in place.
3. Cut two pieces of rhinestone -- one a rhinestone dangle, the other a strip of rhinestone trim -- to fit the hemmed collar, minus 1 inch.
4. Using a sewing machine, sew the rhinestone dangle trim to the bottom of the grosgrain ribbon. Then use a needle and thread to hand-stitch a strip of rhinestone trim directly above the dangling rhinestone.
5. Unsnap two 3/8-inch snaps. Hand-stitch the snap sockets (the indented sides of snaps), one beside the other, to the 1-inch hem. Stitch the snap balls (the protruding sides of snaps) on reverse side of other end, so snaps will meet when hems are brought together.
Tools and Materials
Dog bowl template
Scissors
Ruler
Brayer
Bone folder
Pinking shears
Oilcloth
Heavyweight plastic from three-ring binder
Petronio's All-Purpose Cement
Paintbrush
Heavy-duty adhesive Velcro dots
Collapsible Dog Bowl How-To
1. Cut two 20-inch-square pieces of oilcloth.
2. Download the dog bowl template and print three copies.
3. Using the template and a ruler as a guide, cut the stabilization pieces from the plastic. Cut one large triangle, three small triangles, and three large curved pieces.
4. Brush cement glue on one side of the plastic pieces.
5. Brush cement glue on the wrong side of each cut piece of oilcloth, leaving a clean 1-inch perimeter.
6. Wait for cement glue to get to dry-tack stage.
7. Lay one piece of oilcloth glue-side up. Lay the plastic pieces down onto this piece of oilcloth, pressing them into the glue, in the formation shown in the assembly key on the template. Leave about 1/16 of an inch between the large triangle and the curved pieces; leave about 1/4 inch between the curved pieces and the small triangles.
8. Lay the second piece of oilcloth over the first piece, with glue-side down, aligning edges of both pieces of oilcloth and sandwiching the plastic pieces between them.
9. Use a brayer to smooth out air bubbles.
10. Use a bone folder to trace the edges of the plastic pieces.
11. Trim 1/4 inch around the entire shape formed by the plastic pieces with pinking shears. The cut line is represented as a dotted line in the assembly key on the template.
12. Turn entire piece over. Place adhesive Velcro dots, with male and female pieces stuck together, on each of the small triangle tabs.
13. Turn the piece over so the Velcro dots are on the bottom. Fold up the 3 curved sides of the bowl, pulling the area under each of the triangle tabs in toward the center and folding them flat against the inside of each side. Fold each triangle tab over the lip of the bowl, sticking the other side of each Velcro dot to the outside of the bowl.
14. To collapse the bowl, separate each Velcro dot and flatten.
Resources
Oilcloth can be found at oilcloth.com. (Martha used the Faux Bois Birch design.) Petronio's All-Purpose Cement is available at instantshoeshine.com.
Measuring tape
Animal-print paper, such as wrapping paper or page from a clip-art book
Colored card stock
Scissors
Spray glue
Shallow cardboard box
Rug underlay (foam webbing used underneath rugs for grip)
Fish template
Fabric
Pins
Pinking shears
Cotton batting or wool scraps
Piece of paper
Catnip
Needle and thread
Upholstery needle and thin sturdy twine, for hanging
1. Trace template onto two layers of fabric. Cut out shapes.
2. Pin right sides together, leaving 1/4-inch seam allowance. Sew seam, and leave 1 1/2-inch opening for filling.
3. Trim seams with pinking shears.
4. Turn right side out. Press seams flat.
5. Stuff with cotton batting or wool scraps until firm. Shape a piece of paper into a funnel, and use it to add 1 to 2 tablespoons of dried catnip or to fill the whole toy with catnip.
6. Hand-stitch opening closed.
7. If desired, make fishing line: Thread an upholstery needle with 30 inches of thin sturdy twine, and sew through the seam of the fish's mouth. Tie knot to secure.
1. Using templates as guides, cut out one large and one small feather from two pieces of different colored medium-weight wool felt.
18" wool felt squares: Pretty Pastels (#815823) in Lilac, Iris, Aqua, Maize, and Peach, and Harvest Hues (#815824) in Peas, $7.95 each, from Magic Cabin, 888-623-3655. 16mm/5BU Hourai Shine Bell in Silver, $1 for two, and 1-by-7-mm Jump Ring in Silver, $1 for 21, from Toho Shoji, 212-868-7465. Medium polyester satin cord (SIC-3100, color #34), $1.02 per meter, from Shindo, 212-868-9311.

























0 comments:
Post a Comment